Sand Casting Procedure A Comprehensive Guide
Sand casting, also known as sand mold casting, is one of the oldest and most versatile metal casting processes. This method uses sand as the primary mold material, making it suitable for a wide range of applications, from small craft processes to large industrial projects. In this article, we will explore the sand casting procedure, highlighting its steps, advantages, and considerations for successful casting.
Step 1 Designing the Pattern
The first stage of the sand casting process begins with creating a pattern, which is a replica of the final product. Patterns can be made from various materials such as wood, metal, or plastic and must account for shrinkage, which occurs when the metal cools and solidifies. The design should also incorporate features like draft angles to facilitate the removal of the pattern from the mold.
Step 2 Preparing the Mold
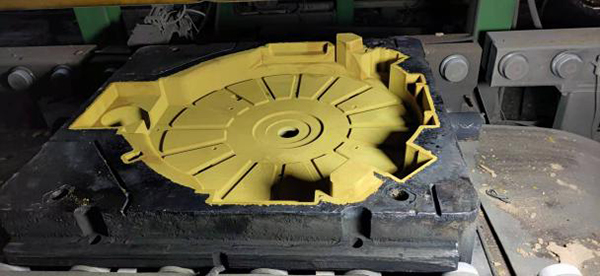
The next step involves preparing the mold by packing a mixture of sand and binders around the pattern. This mixture, typically a combination of silica sand, clay, and water, is compressed to create the mold cavity. The quality of the sand and the technique used for packing are crucial, as they determine the mold's integrity and accuracy. Once the sand is compacted, the pattern is carefully removed, leaving behind a hollow impression of the desired shape.
Step 3 Core Making (if necessary)
In certain casting designs that feature hollow sections, cores are required. A core is a separate piece made from sand or similar materials, which is placed within the mold to create internal cavities. Cores are typically made using a similar sand mixture and are removed after the metal is poured and solidified. Proper core placement and stability are vital to avoid defects in the final casting.
Step 4 Melting the Metal
sand casting procedure

After preparing the mold, the next step is to melt the metal that will be poured into the mold cavity. Common metals used in sand casting include aluminum, bronze, iron, and magnesium. The metal is heated in a furnace until it reaches its molten state, ensuring that it is free of impurities and meets the specifications required for the casting.
Step 5 Pouring the Molten Metal
Once the metal is ready, it is carefully poured into the prepared mold. This step requires skill and precision to ensure that the mold is filled completely and evenly, while minimizing the risk of defects such as air pockets or inclusions. Pouring can be done manually or using automated systems, depending on the complexity of the design and the scale of production.
Step 6 Cooling and Solidification
After the mold has been filled, the molten metal is allowed to cool and solidify. The cooling time depends on the thickness of the casting and the type of metal used. This phase is critical as it influences the mechanical properties and dimensional accuracy of the finished product.
Step 7 Cleaning and Finishing
Once the metal has cooled and solidified, the mold is broken apart to reveal the casting. The next step involves cleaning the casting to remove any sand residues, gates, or runners that may be attached. This can be done using various techniques, including shot blasting, grinding, or chemical cleaning. After the initial cleaning, further finishing processes like machining or polishing may be applied to achieve the desired surface quality.
Conclusion
The sand casting procedure is a time-honored manufacturing technique that combines creativity and engineering. Its adaptability allows for the production of intricate components across various industries, from automotive to aerospace. By understanding each step of the process, manufacturers can optimize their methods to produce high-quality castings that meet their specific needs. As technology evolves, the sand casting process continues to adapt, integrating advancements that enhance efficiency and precision, ensuring its relevance in modern manufacturing.
Post time:Aug . 09, 2024 00:30
Next:Exploring the Innovations and Techniques in Sand Casting Manufacturing Across China Today
